 Pin this
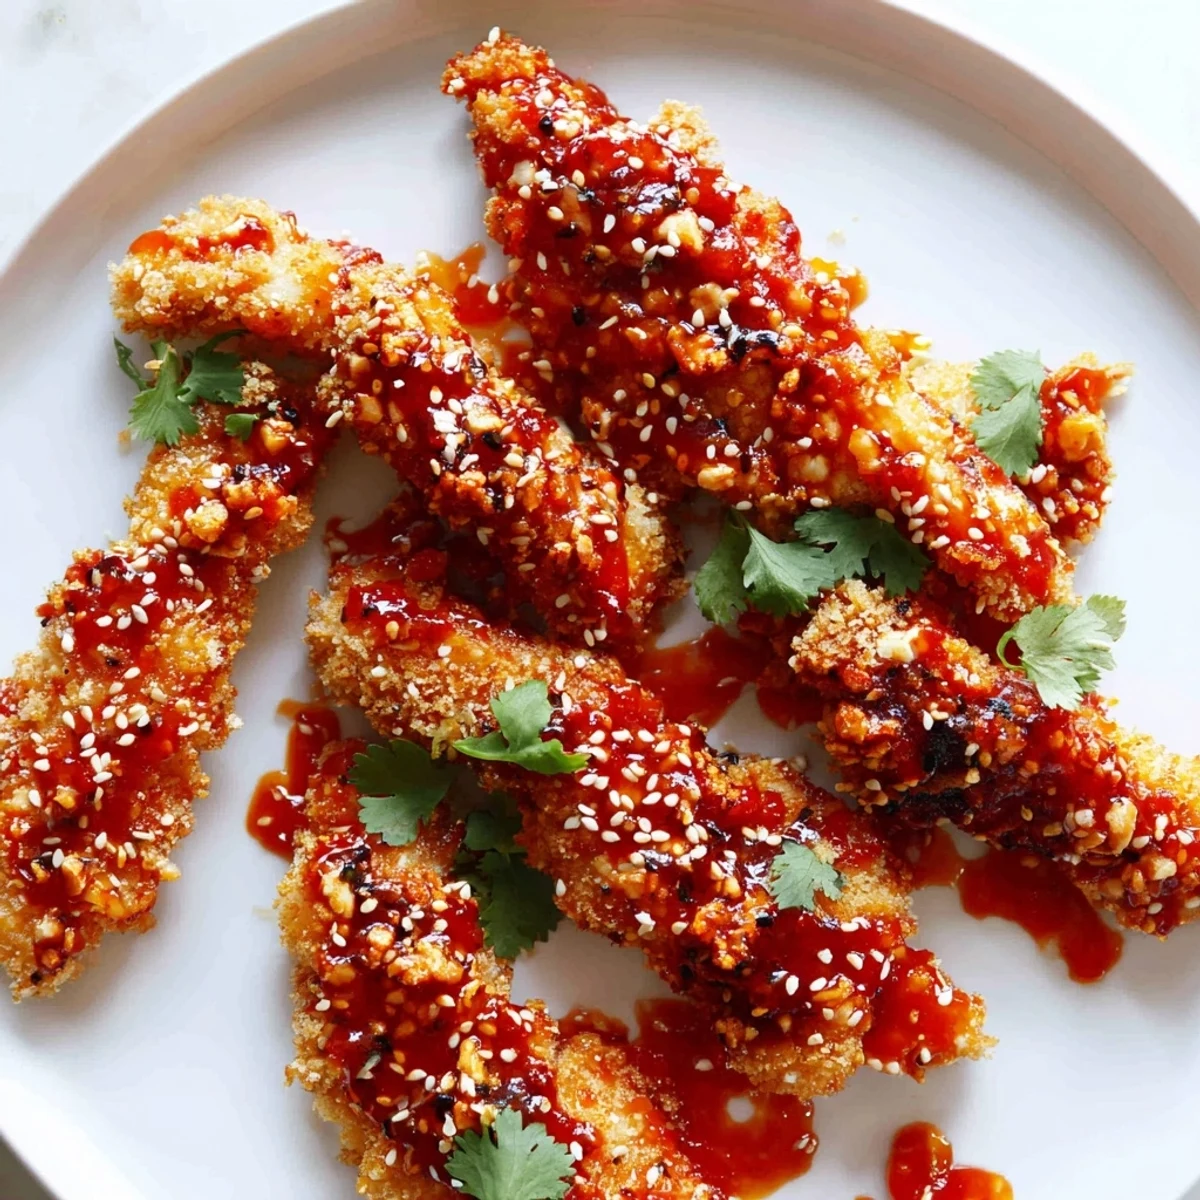
 These Thai sticky chicken fingers are everything you want in a weeknight dish — crispy on the outside, juicy on the inside, and coated in a glossy, finger-licking glaze. The chicken is marinated in soy, lime, fish sauce, garlic, and ginger, then coated in panko breadcrumbs and baked or fried until golden.
The real magic happens when the crispy strips get tossed in a homemade Thai sticky sauce made from sweet chili, honey, soy sauce, rice vinegar, and a kick of sriracha. Garnished with sesame seeds and fresh cilantro, they're irresistible as a main course alongside jasmine rice or as a crowd-pleasing appetizer.
The sizzle of chicken hitting a hot pan on a rainy Tuesday evening is, frankly, one of life's most underrated sounds. I threw these Thai sticky chicken fingers together for a friend who claimed she didnt like sweet sauces with her meat, and she quietly polished off half the platter before anyone else got near it. That sauce is a sticky, tangy little ambush in the best possible way. You will want extra napkins, and you will not care.
I made a huge plate of these for a backyard gathering last summer, setting them on the table beside a bowl of cucumber salad and some ice cold drinks. Within ten minutes the platter looked like a crime scene of sesame seeds and empty space, and three different people asked for the recipe before I even had a chance to sit down with my own plate.
Ingredients
- Chicken: 600 g boneless skinless chicken tenders or breast cut into strips work beautifully here because the shape gives you that classic finger food feel.
- Soy sauce (marinade): 2 tbsp adds a deep salty base that penetrates the meat and keeps it juicy from the inside out.
- Lime juice: 1 tbsp brightens the marinade and starts tenderizing the chicken the moment it makes contact.
- Fish sauce: 1 tbsp is the secret that makes people close their eyes and ask what is in this, so do not skip it even if you are skeptical.
- Garlic: 1 clove finely minced because raw garlic in a marinade is a quiet powerhouse of flavor.
- Ginger: 1 tsp freshly grated adds a warmth that ties the whole Thai flavor profile together.
- All purpose flour: 100 g creates the first layer of coating that helps the egg adhere properly.
- Eggs: 2 large eggs act as the binder between flour and panko, and this is not the place to skimp.
- Panko breadcrumbs: 120 g gives you that shatteringly crisp exterior that regular breadcrumbs simply cannot match.
- Salt and pepper: 1/2 tsp each mixed into the panko seasons the crust directly so every bite is balanced.
- Sweet chili sauce: 60 ml is the backbone of the sticky sauce, delivering sweetness with a gentle warmth.
- Honey: 2 tbsp thickens the glaze and adds a floral sweetness that rounds out the tang.
- Soy sauce (sauce): 2 tbsp brings savory depth to balance the sweet chili and honey.
- Rice vinegar: 1 tbsp cuts through the sweetness with a clean sharp acidity.
- Sriracha: 1 tbsp optional but recommended if you enjoy a slow build of heat behind all that sticky sweetness.
- Sesame oil: 1/2 tsp is a finishing touch that makes the sauce taste rounded and complete.
- Garnish: Sesame seeds, chopped cilantro, and lime wedges are optional in theory but in practice they elevate everything.
Instructions
- Marinate the chicken:
- Whisk together the soy sauce, lime juice, fish sauce, garlic, and ginger in a bowl until combined. Toss the chicken strips in the mixture until every piece is coated, then cover and let it sit for at least 15 minutes while you set up the rest.
- Set up the coating station:
- Arrange three shallow bowls in a row, one with flour, one with beaten eggs, and one with panko mixed with salt and pepper. This assembly line approach keeps your hands from turning into breaded claws halfway through.
- Preheat and prepare:
- Heat your oven to 200 degrees Celsius (400 Fahrenheit) and line a baking sheet with parchment paper if baking, or heat about a centimeter of oil in a wide pan if frying. The oil is ready when a small pinch of breadcrumb sizzles on contact.
- Coat the chicken:
- Remove each strip from the marinade, letting excess drip off, then dredge it through flour, dunk it in egg, and press it firmly into the panko mixture. Really press the crumbs in with your palms because a loose coating will fall off during cooking.
- Cook until golden:
- Arrange the coated pieces on the baking sheet and bake for 18 to 22 minutes flipping halfway through, or fry for about 3 to 4 minutes per side until deeply golden and cooked through. You are looking for a crust that sounds hollow when tapped with tongs.
- Make the sticky sauce:
- While the chicken cooks, combine the sweet chili sauce, honey, soy sauce, rice vinegar, sriracha, and sesame oil in a small saucepan over medium heat. Stir gently for 3 to 5 minutes until the sauce bubbles and thickens just enough to coat the back of a spoon.
- Toss and glaze:
- Transfer the hot cooked chicken fingers into a large bowl and pour the warm sauce over them, tossing gently with tongs until every piece is coated in that glossy amber glaze.
- Finish and serve:
- Pile the saucy chicken fingers onto a platter, scatter with sesame seeds and cilantro, and tuck lime wedges around the edges. Serve immediately because the magic of crispy and sticky together is time sensitive.
 Pin this
 There is something about a platter of sticky golden chicken fingers that turns perfectly composed adults into people who eat standing up over the kitchen counter.
Frying Versus Baking
Baking is my default because it means less oil splatter on the stovetop and I can walk away to set the table while it cooks. That said, shallow frying delivers a crunch that is almost impossible to replicate in an oven, so if you are making these for a special occasion or a particularly judgmental crowd, the pan is worth the mess. Either way, make sure the chicken is cooked through by checking that the center is no longer pink and the juices run clear.
What to Serve Alongside
A simple cucumber salad with rice vinegar and a pinch of sugar is the cool crunchy counterpoint these sticky fingers need. Steamed jasmine rice soaks up any extra sauce that drips off, which is a blessing because that sauce is too good to lose. For a more substantial spread, add a quick slaw or some steamed edamame with sea salt.
Getting Ahead and Storing Leftovers
You can marinate the chicken up to overnight in the fridge, which makes the actual cooking part feel almost effortless. Leftovers keep well in an airtight container in the refrigerator for about three days, though the crust will soften over time.
- Reheat leftovers in a hot oven or air fryer for a few minutes to bring back some of the crunch.
- Keep the sauce separate from the cooked chicken if you are storing them, because reuniting them fresh is always better.
- These do not freeze well once sauced, so enjoy them in the moment or save the coating and sauce as separate components for later.
 Pin this
 Make these once and they will become the dish people expect you to bring to every gathering, which is a compliment even if it means you never get to try bringing a salad again.
Recipe FAQs
- → Can I bake these chicken fingers instead of frying?
-
Yes, baking works great. Preheat your oven to 200°C (400°F), arrange the coated chicken on a parchment-lined baking sheet, and bake for 18-22 minutes, flipping halfway through. You'll still get a satisfying crunch without the extra oil.
- → How do I make the chicken extra crispy?
-
For maximum crunch, try double-coating the chicken — dip it in egg and panko a second time before cooking. Pressing the panko firmly onto each strip also helps create a thicker, crispier crust that holds up well under the sticky sauce.
- → What can I serve with Thai sticky chicken fingers?
-
They pair beautifully with steamed jasmine rice and a refreshing cucumber salad. You can also serve them as an appetizer with extra dipping sauce on the side, alongside pickled vegetables, or over a simple Asian slaw for a lighter meal.
- → Can I make this dish ahead of time?
-
You can marinate the chicken up to 24 hours in advance and prepare the sauce separately. For the best texture, cook and glaze the chicken just before serving. If needed, reheat in a 180°C (350°F) oven for 8-10 minutes to restore crispiness.
- → Is there a gluten-free version of this dish?
-
Absolutely. Swap the all-purpose flour and panko for gluten-free alternatives, and use tamari instead of regular soy sauce. Double-check your sweet chili sauce and fish sauce labels, as some brands contain hidden wheat.
- → How spicy are these chicken fingers?
-
The heat level is customizable. The sriracha in the sticky sauce is optional — leave it out for a mild, family-friendly version, or add more if you love spice. The sweet chili sauce itself contributes a gentle warmth without overwhelming heat.